• Home
    • Who We Are
    • Testimonials
    • Subscribe
    • Employment Opportunities
    • Landscaping
    • Vegetable Gardens
    • Ecological Services
    • Project Gallery
    • Public Workshops
    • Host a Workshop
  • Blog
  • Resources
  • Contact Us
Menu

Rustic Hills Garden Co

Edible Landscaping | Native Gardens
  • Home
  • About
    • Who We Are
    • Testimonials
    • Subscribe
    • Employment Opportunities
  • Design & Install
    • Landscaping
    • Vegetable Gardens
    • Ecological Services
    • Project Gallery
  • Workshops
    • Public Workshops
    • Host a Workshop
  • Blog
  • Resources
  • Contact Us
×

Blog

Featured
pexels-rodnae-productions-5847876.jpg
Recipes
Nov 25, 2024
Homemade Bone Broth
Recipes
Nov 25, 2024
Read More →
Recipes
Nov 25, 2024
IMG_0021.JPG
Edible Gardening, Fall Gardening, Recipes
Oct 8, 2024
Butternut Squash Pizza with Caramelized Onions & Rosemary
Edible Gardening, Fall Gardening, Recipes
Oct 8, 2024
Read More →
Edible Gardening, Fall Gardening, Recipes
Oct 8, 2024
k1.jpeg
Recipes
Jun 29, 2024
Brew Your Own Kombucha with Garden-Inspired Flavors!
Recipes
Jun 29, 2024
Read More →
Recipes
Jun 29, 2024
6D5BF5BE-CE9F-48D1-BFF5-A138833ECDA2.jpg
Summer Gardening, Fall Gardening, Vegetable Gardening
Apr 4, 2024
Plant Now: Your Early Spring Garden
Summer Gardening, Fall Gardening, Vegetable Gardening
Apr 4, 2024
Read More →
Summer Gardening, Fall Gardening, Vegetable Gardening
Apr 4, 2024
q.jpeg
Edible Gardening, Recipes, Winter Gardening
Feb 27, 2023
Winter-Meets-Spring Quinoa Salad
Edible Gardening, Recipes, Winter Gardening
Feb 27, 2023
Read More →
Edible Gardening, Recipes, Winter Gardening
Feb 27, 2023
k1.jpeg
Recipes
Sep 14, 2022
Basic Korean Kimchi
Recipes
Sep 14, 2022
Read More →
Recipes
Sep 14, 2022
b.jpeg
Recipes
Aug 2, 2022
Fermented Green Beans
Recipes
Aug 2, 2022
Read More →
Recipes
Aug 2, 2022
Untitled design (1).png
Jun 9, 2022
The Carbon Conscious Yard
Jun 9, 2022
Read More →
Jun 9, 2022
d.jpeg
Other
Apr 29, 2022
Dandelion Season is Coming...Here's the Easiest Fix Ever!
Other
Apr 29, 2022
Read More →
Other
Apr 29, 2022
IMG_7114 (1).jpg
Apr 1, 2022
Building Natural Support Structures
Apr 1, 2022
Read More →
Apr 1, 2022
793E3DEC-86BC-4AC0-99BD-2EB96662B9C1.jpg
Winter Gardening, Edible Gardening
Feb 3, 2022
How to Start Seeds Indoors
Winter Gardening, Edible Gardening
Feb 3, 2022
Read More →
Winter Gardening, Edible Gardening
Feb 3, 2022
sun1.jpeg
Winter Gardening
Dec 26, 2021
Growing Microgreens
Winter Gardening
Dec 26, 2021
Read More →
Winter Gardening
Dec 26, 2021

Building Natural Support Structures

Melissa Wilsford April 1, 2022

If you’ve been wondering how to support your climbing plants in a sustainable and economical way, this post is for you. There are many types of garden structures that can be used to support plants in the garden. Popular choices included flat trellises, arbors, obelisks, arch trellises and pergolas. Permanent, sturdy trellises will need to be used for perennial plants like grapes or kiwi vines. But annual vegetables can grow on supports that last just a season or two before needing to be refreshed. These are the types of natural structures we’ll be covering in this post. But first, we’ll cover the benefits of using support structures and what plants will do best on them.

Why use garden supports?

Make better use of your space:

While some plants (like cucumbers, squash and melons) will happily sprawl across flat ground, you’ll be able to make much more use of your garden space by allowing them to grow vertically rather than horizontally.

Encourage healthier growth:

Growing vertically also allows you to reduce insect damage and disease by providing air circulation and keeping your plants off the ground where disease can spread quickly.

Easier harvesting and healthier fruit:

With vertical growing, you get the benefit of having your plants closer to your line of sight so you can easily spot and harvest when it’s time to do so. It’s also worth noting that growing vertically allows some fruits like cucumbers to grow straighter and cleaner, keeping them out of the dirt and looking more attractive.

What types of plants need support structures?

Anything that climbs (or can climb) will be happiest on a structure in your garden. While this list isn’t exhaustive, below are some of the most common edible plants that would benefit from a vertical support structure.

  • Peas

  • Pole Beans

  • Squash

  • Melons

  • Cucumbers

  • Cherry Tomatoes (not actually a vining plant, but can be guided and attached to a trellis)

  • Nasturtium (edible flowers and leaves)

  • Grapes

  • Hops

When to build your structures

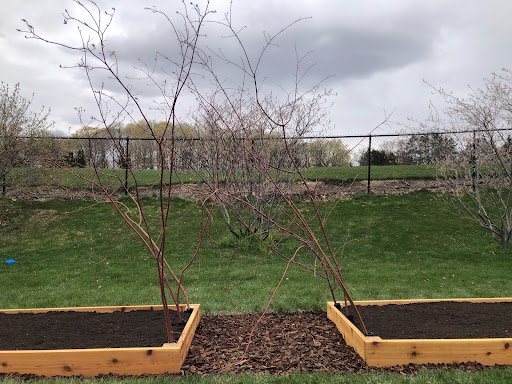
While you can build these structures at any time, early spring is a great time to collect flexible wood that doesn’t need to be stripped of its leaves. If you wait until the ground has thawed but before everything leafs out, you can gather what you need and get it built before your plants go in the ground. This allows you to utilize the natural resources you have available and plan your space well before planting time.

Here are four ways to get free materials to make your garden structures:

  1. Cut down saplings that are growing in your yard where they shouldn’t be. This is a great time to clean up any areas of your yard where unwanted young trees like to grow.

  2. Use flexible branches from your late winter tree trimming/pruning. You’ll get the added benefit of healthier trees and fruit from your pruning efforts, and then get to use that wood to grow more food!

  3. Harvest any natural materials you may have access to like wild grape vine or dogwood. Even better, clear out invasive plants like bittersweet vine and buckthorn trees. While you should always ask permission when harvesting on property not owned by you, you can be sure that no one will miss this noxious plants!

  4. Ask your neighbors if you can help them clean up their yard by pruning their trees or cleaning out any small unwanted trees on their property. You get the materials you need for free with the added benefit of being a good neighbor.

How to build your structures

Below we cover how to build an obelisk and an arched trellis, but you can use these same methods to craft any structure your imagination can come up with! Always start with a nice supply of long pieces of flexible wood that will suit the size structure you want to create.
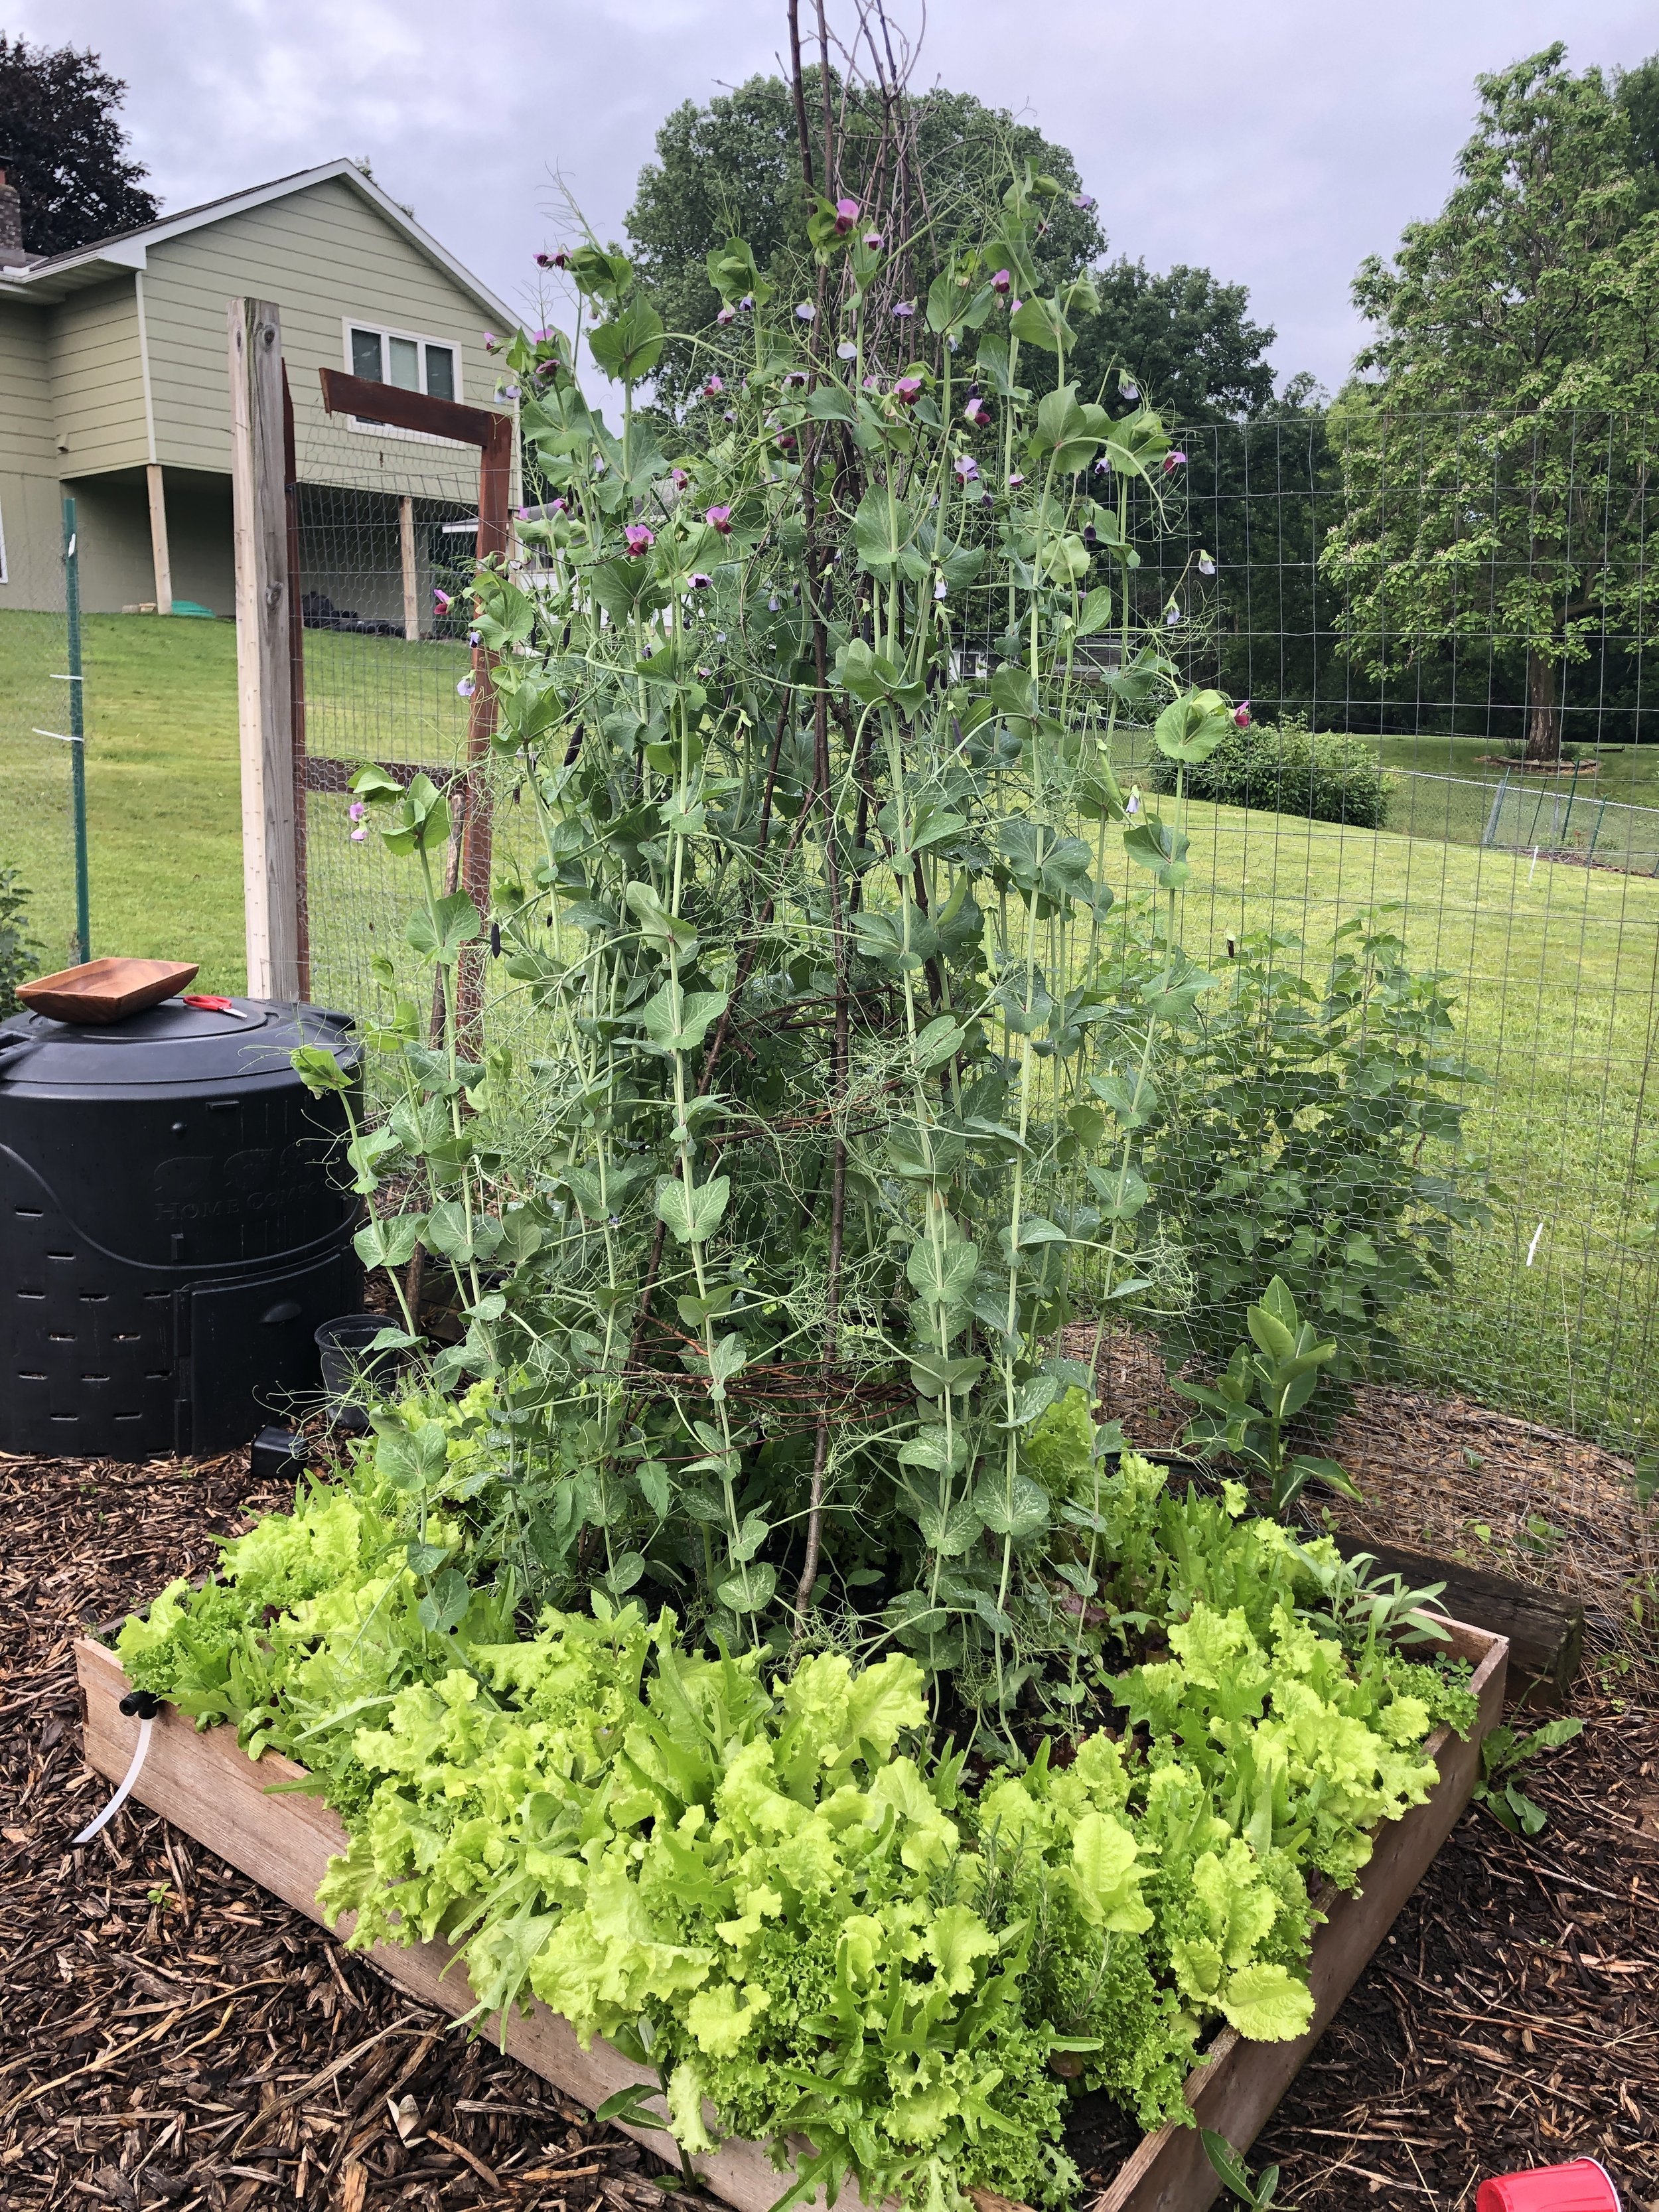
Obelisk

These obelisks are built by anchoring the vertical pieces straight into the ground. Since the ground is soft and muddy in the spring, it is easy to work with and does a great job holding everything in place. Here are the basic steps:

  1. Start by sinking long, vertical pieces into the ground 10”-12” apart in a circular shape.

  2. Join the pieces at the top and either secure with a piece of twine or twist them around each other in a braid-like fashion and they will hold just as well, if not better!

  3. Add in horizontal supports every foot or two by weaving in and out of the vertical pieces in a circle. Go around a few times until you feel that the piece is sturdy. These lateral supports will provide more anchors for your climbing vines and give overall stability to the structure.

The process is more an art than a science. You will need to work with the pieces you have and let them shape your final project. Watch the video below for an overview of how we built an obelisk using buckthorn and dogwood.

Here is that same obelisk mid-season, covered in purple Sugar Magnolia snap peas:
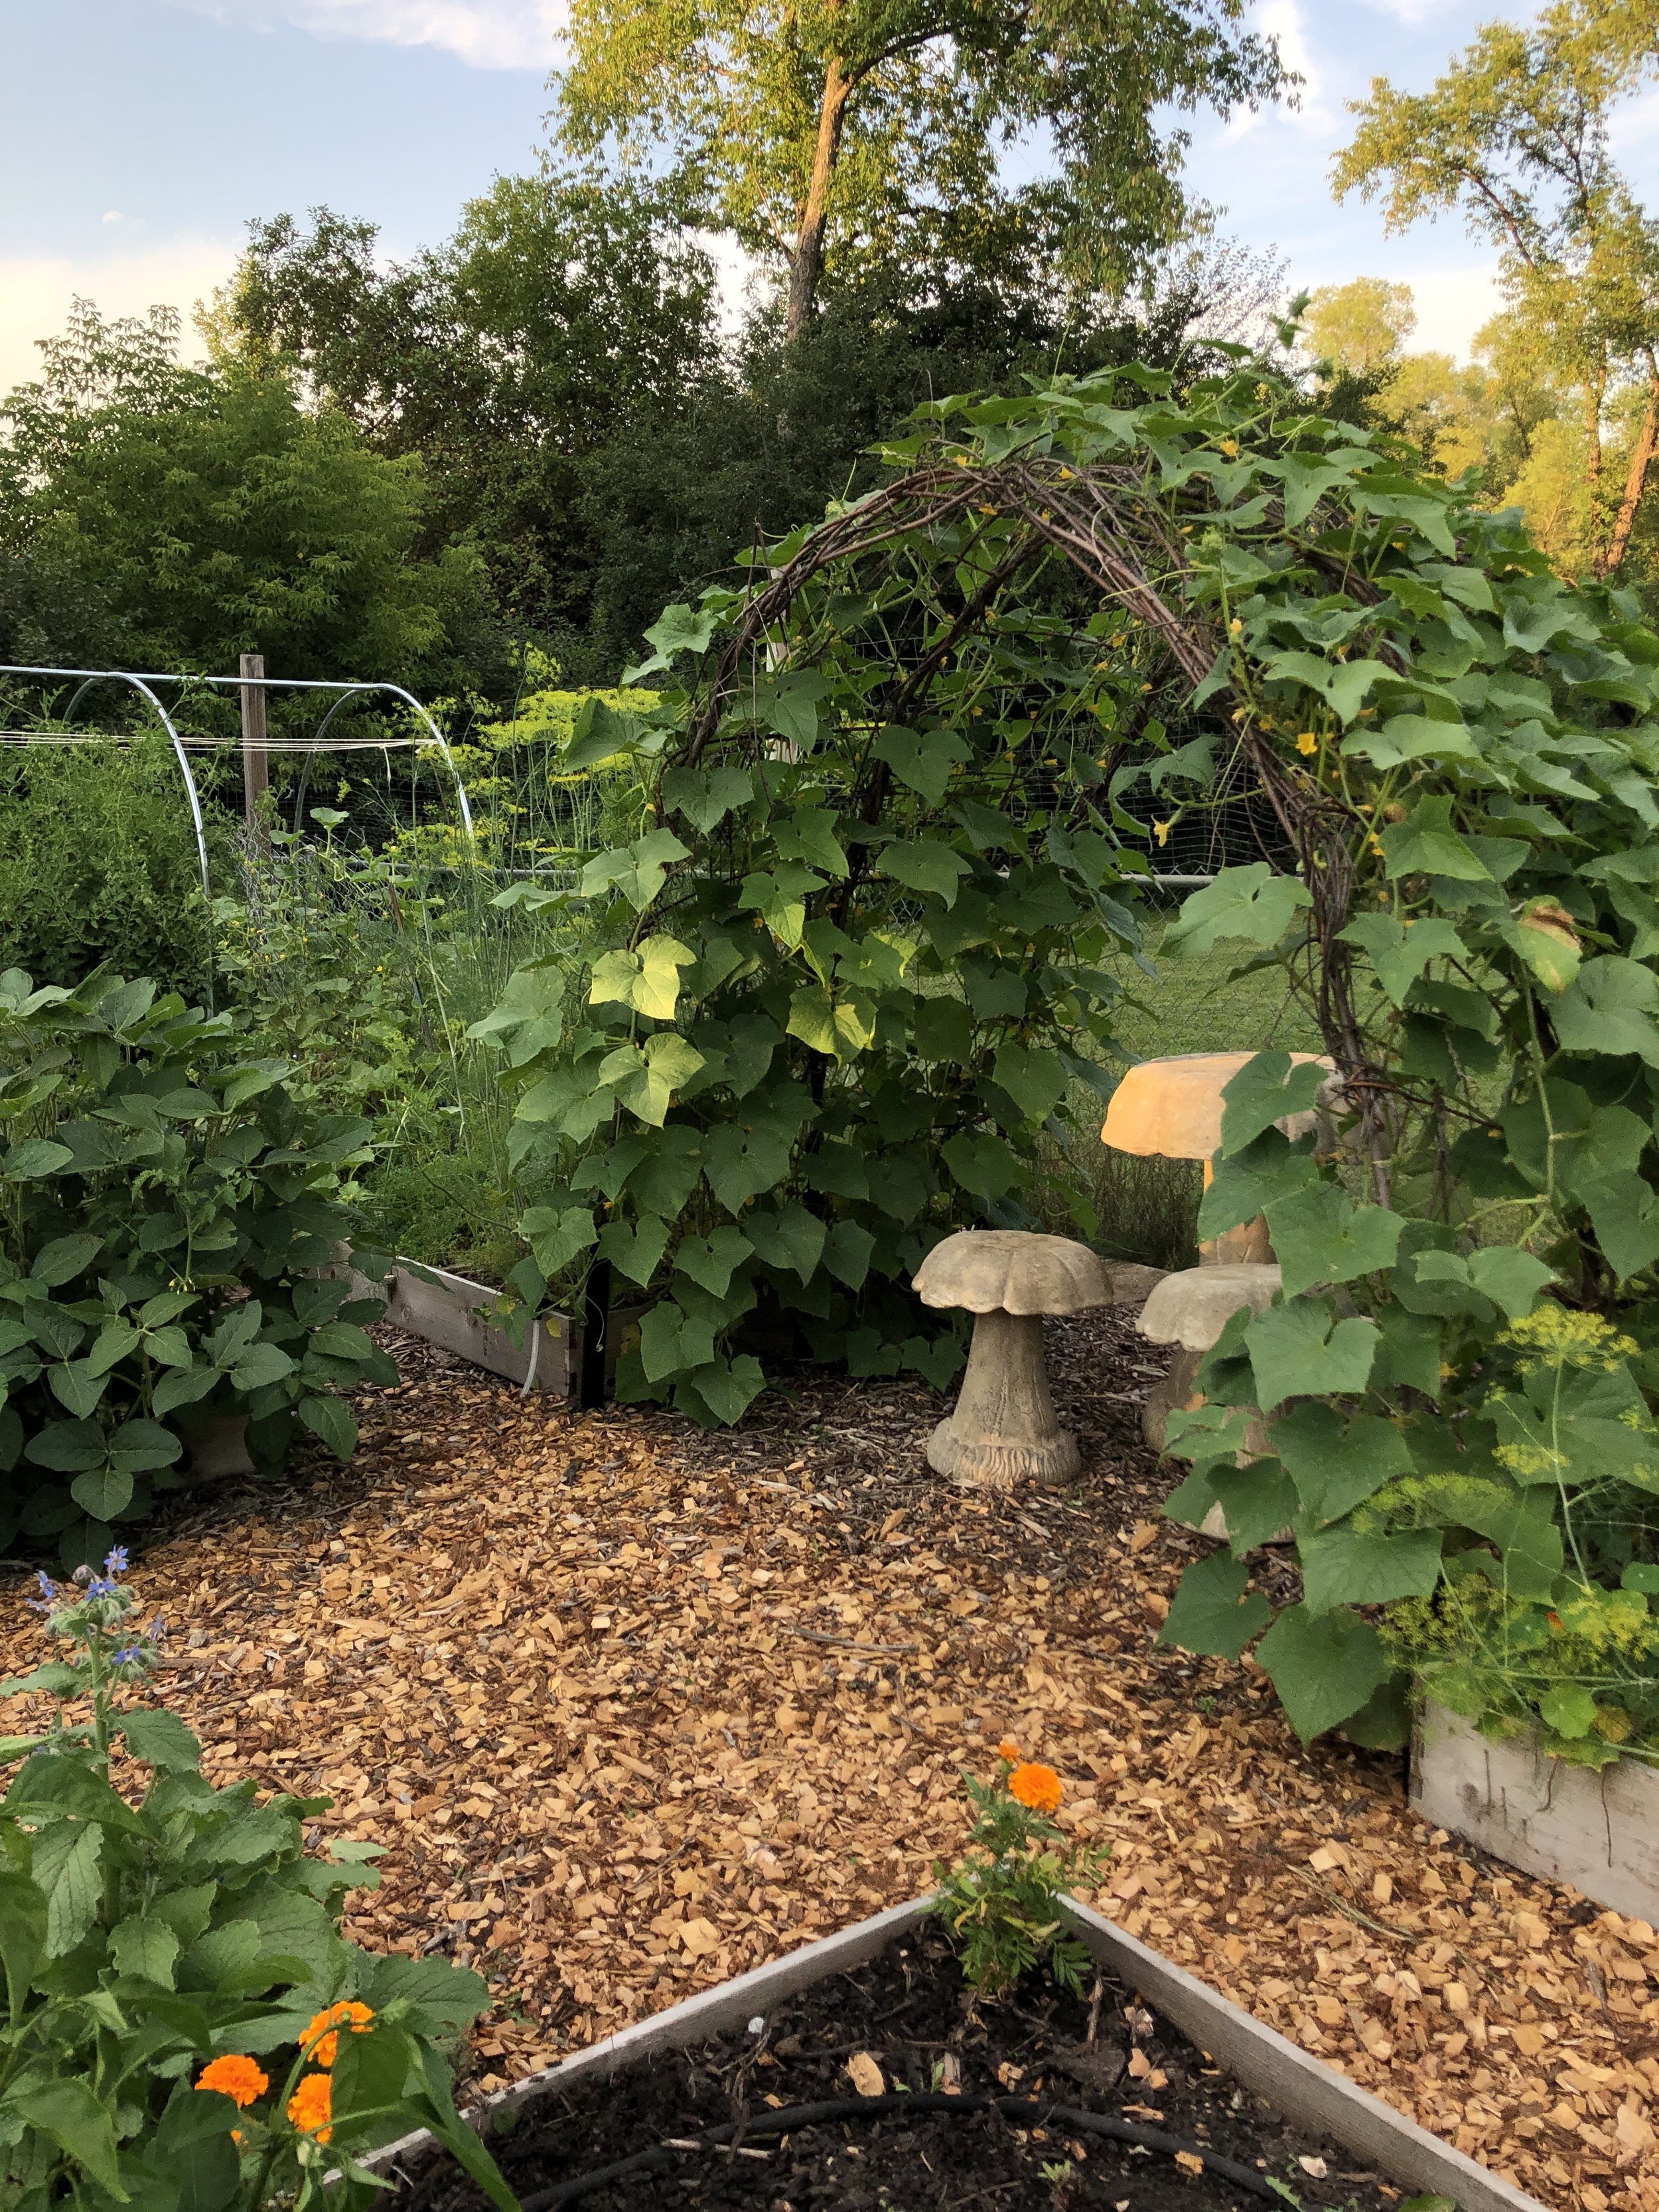
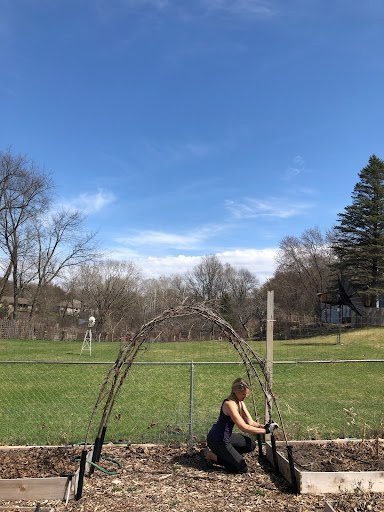
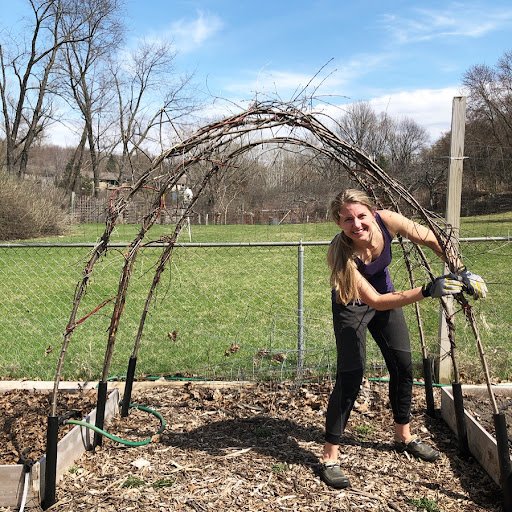
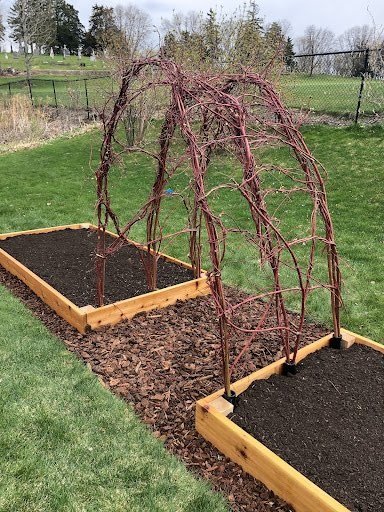
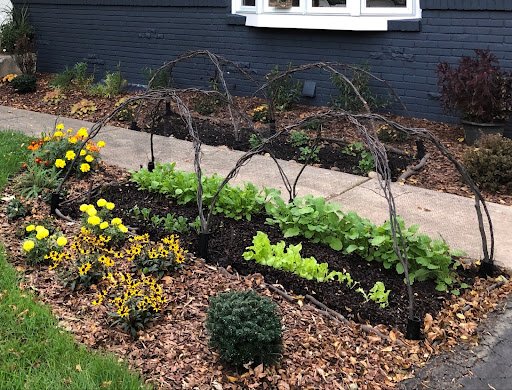
Arch Trellis

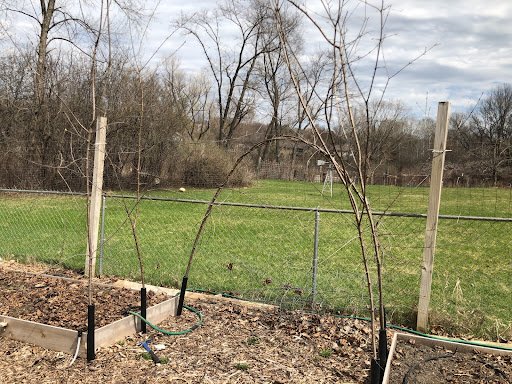
While an arch trellis can definitely be anchored using the same method as the above obelisk (vertical pieces straight into the ground), the following describes how to use PVC and rebar for sturdier support. This method is helpful for larger structures that have a lot more pieces involved, and also has the added benefit of helping the structure last a bit longer, being the wood will not rot as quickly as it would in the ground. You will need:

  • Flexible branches (young wood). Ideally 8’ or longer.

  • 2” diameter PVC pipe, cut into 8” lengths

  • 2’ rebar

See the gallery below for step-by-step directions on how to build an arch for your garden:

Place PVC and Rebar
Place PVC and Rebar

- PVC and rebar form the foundation for the arch. These can be installed above or below ground.

- Pound in rebar to desired height - at soil level for in-ground, or ~7” above soil level for above ground. 

- Place 8” PVC over rebar so that rebar does not extend beyond PVC.

- Install pieces at least every 20” (3 pieces for 4’ wide bed).

Choose Branches
Choose Branches

- Choose largest and longest branches and put 1-3 in each PVC base, choosing branches with more lateral stems for the center positions.

Form Arches
Form Arches

- Form first arch by bringing branches from opposite sides together at desired height, wrapping excess length from each branch around the opposite branch to secure. 

- Repeat with remaining branches.

Form Horizontal Supports

- Twist any remaining lateral branches around neighboring branches to form horizontal supports

Form Horizontal Supports (2)
Fill in Supports
Fill in Supports

- Use shorter branches to fill in more horizontal supports, wrapping them around existing branches to secure. You can add many horizontal supports or few. Both will work with a little training of vines.

Finished Product
Finished Product

This finished arch is made of branches from Red-twigged dogwood

Same Method for Cloches

- The same method can be used to make enclosures for vulnerable edibles in your landscape!

Place PVC and Rebar Choose Branches Form Arches Form Horizontal Supports Form Horizontal Supports (2) Fill in Supports Finished Product Same Method for Cloches

Of course, there are many more options for garden structures that will work in your garden if these ideas aren’t for you. We would love to help you design your space and figure out what would work best for your dreams! Below is a sample of some of the structures we have installed in past client gardens - if you’d like some help with your garden, contact us today!

View this post on Instagram

A post shared by Edible Landscaping & Gardens (@rustichillsgardenco)

← Dandelion Season is Coming...Here's the Easiest Fix Ever!How to Start Seeds Indoors →

Search Posts

  • Recipes 11
  • Edible Gardening 7
  • Fall Gardening 4
  • Summer Gardening 4
  • Vegetable Gardening 4
  • Winter Gardening 5
  • Other 1
  • Perennial Gardening 2
  • Pruning 2
I am so excited to announce that Rustic Hills will be joining the third annual Holiday Forest Fair, hosted by @chick.of.the.woods! Join us on December 14 from 10 AM to 4 PM at the cozy greenhouses of @themustardseedinc garden center in Chaska, Minnes
I love the feedback I get from our clients about the RH crew. My favorite from this year: “I wish I could have spent more time out there with your crew…I felt like ‘these are my people.’” I feel the same way! Seriously
I may not live in a time or place where I can get my food fresh from the local market each day, but I can grow a garden! And my garden carries local, organic and seasonal produce - at a great price! 😉

I can go pick a tray like this any time I want
Whether you want to grow food in a raised bed or two, or all throughout your property intermingled with native plants and beautiful blooming trees and shrubs, we would be honored to help you in any way we can!

*Right now* is the time to meet to disc
These are my family’s go-to meals that feature kale. Not only are they delicious, but they are fast and EASY. No recipes needed - these meals come together with a few ingredients and even fewer steps.

This is why I love kale! It’s so ver

Rustic Hills Garden Co. is a registered LLC with the state of Minnesota and holds a Nursery Stock Dealer’s Certificate for the distribution of certified disease-free nursery plants. Once installed, clients are responsible for the care and health of their plants. Rustic Hills Garden Co. is not obligated to replace plants once plants are accepted by the client at delivery.